If you’re using a TM (Touch Mobile) SIM in the Philippines, you’ve probably heard about the mandatory TM SIM registration under the SIM Registration Act (RA 11934). This government requirement, in partnership with Globe Telecom, aims to make mobile connections more secure and prevent scams or fake identities.
But beyond compliance, registering your SIM opens the door to a smoother, safer, and more rewarding TM experience.
Through the official TM SIM registration link new.globe.com.ph/simreg users can easily verify and secure their numbers in just a few minutes. You can also register via the GlobeOne App for added convenience.
As a long-time Philippines SIM expert, I’ve seen how a properly registered TM SIM prevents no-signal issues and keeps your account protected. Whether you’re a new user or just updating your details, this guide will help you complete your TM SIM registration quickly, correctly, and confidently.
What is TM SIM Registration and Why It’s Important
If you’ve ever wondered what TM SIM registration really means, think of it as your mobile identity check. TM, short for Touch Mobile, operates under Globe Telecom, one of the Philippines’ largest and most trusted networks.
That means your TM number is part of Globe’s nationwide system from load promos to network coverage and SIM verification through the TM SIM registration portal.
Now, here’s the deal: under the Philippine SIM Registration Act (RA 11934), all prepaid and postpaid SIM users are required to register their SIM card. The goal is to stop text scams, fraud, and online crimes while keeping every user accountable for their mobile identity.
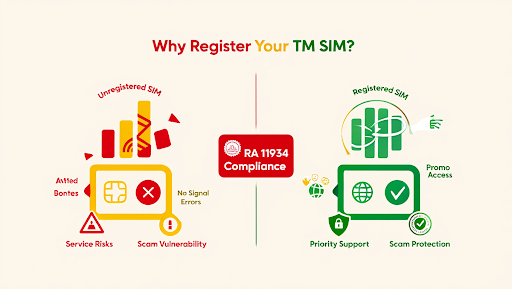
So when you register SIM card TM, you’re not just following a rule you’re protecting your digital life. A registered TM SIM gives you access to stable connections, better promo eligibility, and priority service in Globe stores.
Meanwhile, unregistered or inactive SIMs can suddenly lose signal, get temporarily blocked, or show errors like “TM no signal today.”
In short, registration isn’t a hassle, it’s your gateway to a more secure, seamless, and benefit-filled TM experience.
Requirements for SIM Registration TM
Before diving into the actual process, it’s important to prepare all the requirements for SIM registration TM users must have on hand. Whether you’re using a prepaid, postpaid, or roaming TM SIM, the verification process under Globe Telecom follows the same legal framework set by the Philippine SIM Registration Act (RA 11934).
Here’s what you’ll need before heading to the TM SIM registration link or SIM registration TM portal:
Personal Information Required
When you register TM Sim, make sure you provide accurate details that match your valid ID:
- Full Name (First, Middle, Last)
- Date of Birth
- Sex
- Complete Address
- Type of ID and ID Number
- A clear photo or selfie holding your valid ID
Accepted Valid IDs for TM SIM Registration
| Type of ID | Accepted For |
| Philippine Passport | All SIM types |
| Driver’s License | All SIM types |
| National ID (PhilSys) | Prepaid & Postpaid |
| SSS / GSIS Card | Local users |
| UMID | Local users |
| PRC ID | Professionals |
| OFW ID | Roaming SIMs |
| Alien Certificate of Registration | Foreign residents |
Note: TM prepaid, postpaid, and roaming SIMs may have slight variations in ID verification or photo upload steps, but all go through Globe’s secure verification system.
If you’ve got these details ready, the register SIM TM process is quick and smooth, no need to stress. Once verified, your number becomes officially registered and eligible for all TM perks and promos.
How to Register TM SIM Card (Step-by-Step Guide)
Whether you just bought a new Touch Mobile SIM or your old one needs verification, completing your TM SIM registration is easier than ever. You can do it online, through the GlobeOne App, or even in person if you prefer face-to-face assistance. Here’s how to get it done quickly and safely.
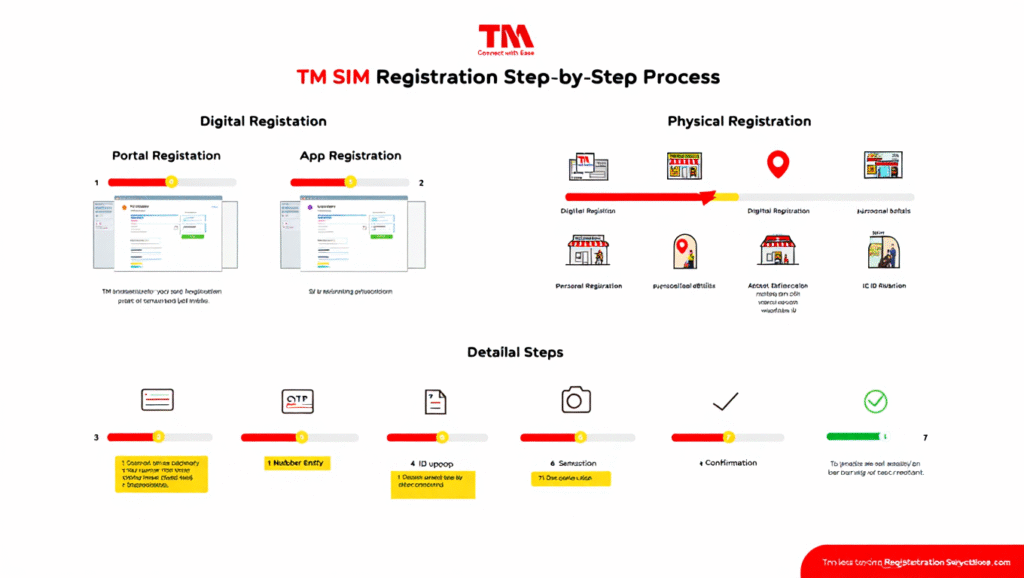
Option 1: Online Registration via TM SIM Registration Portal
The fastest and most convenient way to register your TM SIM card is through the official TM SIM registration portal. This online process is powered by Globe Telecom and works on both mobile and desktop browsers.
- Go to https://new.globe.com.ph/simreg or new.tm.com.ph/simregistration.
- Enter your TM mobile number, then click “Verify” to receive a one-time PIN (OTP).
- Input your personal details (name, address, date of birth) and upload a valid ID photo.
- Take a clear selfie for identity verification.
- Review and submit your registration form.
- Wait for the confirmation message, that’s it! Your SIM is now officially registered.
Pro tip: Use a stable internet connection to avoid timeout errors on the TM website or registration page.
Option 2: Register via GlobeOne App
If you’re already using the GlobeOne App, registering your TM SIM can be done with just a few taps.
Here’s how:
- Open the GlobeOne App and log in with your TM number.
- Tap the “Register Your SIM” banner on the home dashboard.
- Follow the on-screen prompts, upload your ID, confirm your details, and submit.
- You’ll receive a notification once registration is complete.
Why use the app?
- Instant confirmation and status tracking.
- Easier ID upload with your phone’s camera.
Option 3: Offline or Assisted Registration
If you’re not comfortable registering online or your phone isn’t internet-ready, TM has you covered with offline registration options.
- Globe Store
- Authorized TM registration kiosk
- Partner retailer or barangay assistance booth
Just bring your valid ID, your TM SIM, and a working mobile number. TM staff will assist you through the SIM registration TM process using the same secure verification system used online.
This is especially helpful for senior citizens, minors under guardianship, or OFWs returning home who need to reactivate or register SIM TM manually.
How to Check If Your TM SIM Is Registered
Wondering if your TM SIM registration went through? Here’s how to confirm it quickly:
1. Via Text or Call
Try sending a message or making a quick call. If it goes through, your SIM is likely already registered. If you’re getting “No Signal” or “SIM not registered” errors, you may need to redo the process.
2. Via GlobeOne App
Open the GlobeOne App, log in with your TM number, and check your profile. A “Registered” label beside your number means your SIM is verified.
3. Via TM SIM Registration Link
Visit https://new.globe.com.ph/simreg (also works for new.tm.com.ph/simregistration) and log in using your number. You’ll instantly see your TM SIM registration status.
TM SIM No Signal or No Service | How to Fix It
Seeing “No Signal” or “No Service” on your phone? Don’t worry TM no signal issues are super common and usually easy to fix. It doesn’t always mean your SIM is dead; sometimes it’s just a quick tweak away.
Common Causes
- Expired load or inactive SIM
- Unfinished TM SIM registration
- Wrong or outdated TM APN settings
- Weak coverage in your area
- SIM card not detected properly
Quick Fixes for “TM No Signal Today”
| Problem | Quick Fix |
| No bars / weak signal | Restart your phone or toggle Airplane Mode ON then OFF |
| SIM not detected | Remove and reinsert your TM SIM card carefully |
| Wrong internet settings | Reset or update your TM APN settings under Mobile Network Settings |
| SIM inactive or unregistered | Visit https://new.globe.com.ph/simreg to complete TM SIM registration |
| Poor signal area | Try moving outdoors or near a window for better reception |
| Traveling abroad | Activate TM roaming by texting ROAM ON to 8080 before your trip |
TM Roaming Activation | How to Stay Connected Abroad
Traveling soon? Don’t let your SIM go silent overseas! With proper TM roaming activation, you can stay connected with friends and family even while abroad no need to buy a new SIM or hunt for Wi-Fi.
How to Activate TM Roaming Before Your Flight
To avoid that dreaded “no signal TM SIM abroad” issue, activate roaming before you leave the Philippines:
- Make sure your TM SIM registration is complete and your SIM is active.
- Text ROAM ON to 8080 while you’re still in the Philippines.
- Wait for a confirmation message that roaming has been successfully activated.
- Upon arrival abroad, restart your phone and allow it to connect to a local partner network automatically.
H3 How to Activate TM Roaming While Already Abroad
If you forgot to activate roaming before your flight:
- Insert your TM SIM into your phone.
- Manually select a local partner network from your device’s settings.
- Text ROAM ON to 8080 (some countries may require Wi-Fi to send the text).
- Rebooting your phone signal should appear shortly after.
Tips to Avoid “No Signal TM SIM Abroad”
- Keep at least ₱100 load before flying out.
- Use manual network selection if your phone doesn’t auto-connect.
- Ensure data roaming is switched ON in your phone settings.
- Avoid removing or switching SIMs during travel; it can disrupt activation.
TM Roaming Promos You Should Know
- TM Data Roaming Promo: Affordable data access in select countries so you can browse and chat easily.
- Roam All Net 99 TM: Enjoy 24-hour roaming with calls and texts to all networks for just ₱99 perfect for short trips or layovers.
How to Convert TM Load to GCash
You can easily transfer or convert your TM load to GCash using third-party tools like the Load2Cash app or verified partner websites.
- Download and open the Load2Cash app on your phone.
- Enter your TM number and the amount you want to convert.
- Provide your GCash number as the recipient.
- Confirm the transaction and wait for the conversion to reflect in your GCash wallet.
Tip: Always double-check the app’s legitimacy before using it. Avoid unofficial conversion services that might charge hidden fees or fail to send the amount.
Other Digital Perks for Registered TM SIM Users
Once your TM SIM registration is complete, you unlock access to:
- Exclusive data promos via the GlobeOne App.
- Load sharing and Send Load options to other TM or Globe users.
- Rewards and discounts from partner digital platforms.
- Faster connection to mobile payment apps like GCash, Maya, and ShopeePay.
To save mobile data, use Wi-Fi for app downloads, limit background sync, and activate data saver mode in your phone settings. Registered users also enjoy priority connectivity during peak hours, another plus for staying verified.
Common TM SIM Registration Problems and Solutions
Let’s be real, not every TM SIM registration goes smoothly on the first try. Sometimes the page won’t load, your ID gets rejected, or the system just doesn’t cooperate. Don’t worry, these hiccups are common and usually easy to fix. Here’s how to handle them like a pro.
“Invalid ID” or “Photo Not Accepted”
This usually happens when your uploaded ID image is blurry or doesn’t match your entered details.
Fix:
- Retake the photo in good lighting.
- Make sure your ID is valid and not expired.
- Double-check that the name and birthdate you typed match your ID exactly.
“SIM Already Registered”
If you see this message, your number might have been successfully registered earlier or someone may have tried registering it by mistake.
Fix:
- Check your phone or GlobeOne App for a “Registration Successful” text.
- If you’re unsure, contact TM Customer Care for verification.
- Avoid registering the same number multiple times; it may cause system delays.
TM SIM Registration Link Not Working
Sometimes, the TM SIM registration portal can go offline during heavy traffic or maintenance.
Fix:
- Try visiting tmsimregistration.com.ph or the main Globe portal new.globe.com.ph/simreg.
- Clear your browser’s cache or switch to another device.
- Retry after a few minutes TM usually restores service quickly.
TM System Down or No Confirmation Message
If the system is down, don’t panic, it’s temporary.
Fix:
- Wait a bit and retry the registration later in the day.
- Keep your TM SIM inserted and phone turned on for updates.
- If it’s been more than 24 hours with no response, reach out to TM support via the GlobeOne App or social media.
FAQs About TM SIM Registration
How to register TM SIM without ID?
You can’t register without a valid government-issued ID. The SIM Registration Act requires an official ID such as a Philippine Passport, Driver’s License, Postal ID, or PhilSys ID. This ensures security and proper user verification.
Can I register my TM SIM while abroad?
Yes. You can complete your TM SIM registration online through new.globe.com.ph/simreg or tmsimregistration.com.ph. Activate TM roaming first to receive your OTP during verification.
Is the TM registration link legit?
Only the official TM and Globe portals are legitimate: new.globe.com.ph/simreg and tmsimregistration.com.ph. Avoid unofficial links shared on social media to protect your information.
What to do if I lost my TM number?
Visit the nearest Globe or TM Store with your valid ID and SIM registration proof. Staff can assist in retrieving your number and transferring it to a replacement SIM securely.
Final Thoughts
Registering your TM SIM card isn’t just a legal requirement, it’s your key to uninterrupted connectivity, exclusive promos, and a more secure mobile experience. By registering, you’re protecting your identity and ensuring your number stays active for calls, texts, and data promos.
So, if you haven’t yet registered your TM SIM today through the official portal or the GlobeOne App. Keep your TM number active, update your info when needed, and enjoy worry-free communication wherever you go.
Because at the end of the day, staying connected shouldn’t be complicated, just legit.